Epigraph-Tour
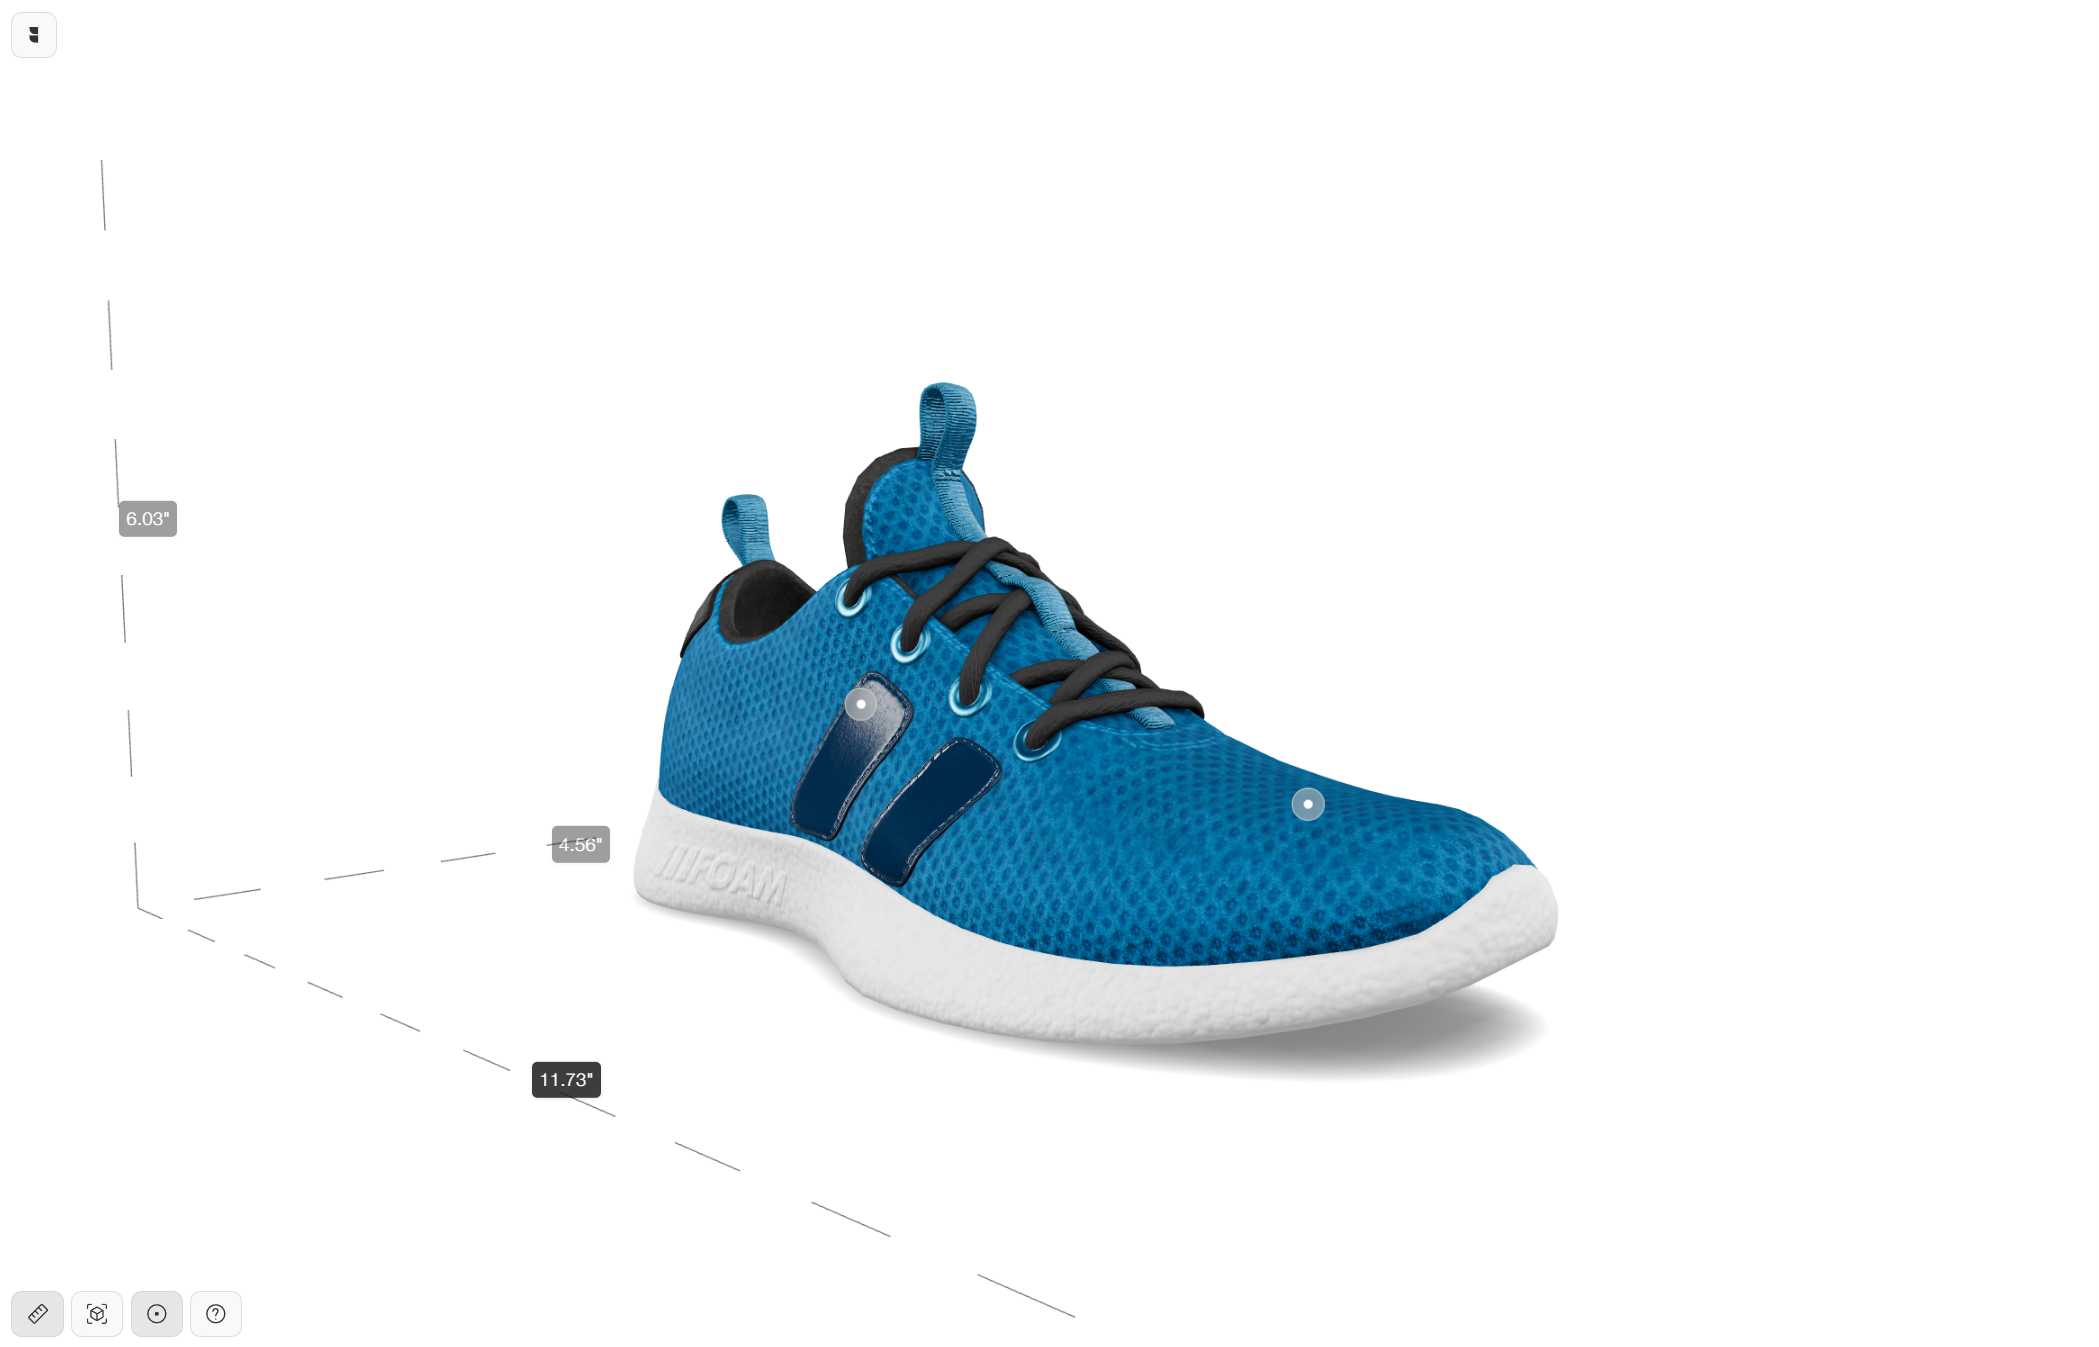
Allow visitors to interact with 3D objects on your page + shows hotspots/annotations to highlight certain features of the product.
Prerequisites
To get the most out of this quickstart guide, you will need:
- A list of product variants with a SKU assigned from Epigraph.
- A production or staging domain added to your Epigraph account.
1. Add the Epigraph-Solutions script to your page
Add the Epigraph-Solutions script to the head of the page that you would like to enable Augmented Reality on.
<head>
  <script async type="module" src="https://cdn.jsdelivr.net/npm/@epigraph/solutions"></script>
</head>
2. Place an <epigraph-tour> on the page
<epigraph-tour> on the pageSimply add the <epigraph-tour> component to your page wherever you'd like to enable AR. To connect it to the correct content, you'll need to add the SKU attribute to the button.
<body>
  <!-- Website Content -->
  <style>
    .epigraph-solutions-wrapper {
      width: 100%;
      height: 800px;
    }
  </style>

  <!-- All stylings must be assinged to this wrapper and not directly on the epigraph component -->
  <div class="epigraph-solutions-wrapper">
  	<epigraph-tour sku="<insert-the-product-sku>"></epigraph-tour>
  </div>

  <!-- Website Content Continued -->
</body>
3. Epigraph will handle the rest
Epigraph will load the 3D model for sku that was requested in the Epigraph-Tour. From here visitors to your site can rotate a 3D model, see dimensions and open the product in AR.
4. Enabling analytics tracking
All epigraph solutions support analytics tracking using GA4 out of the box. In order to enable this feature, the only requirement from the webpage is to add and attribute named ga-measurement-id="<your-ga-4-measurement-id>" and you should start seeing events being fired to your Google analytics.
<epigraph-tour sku="<insert-the-product-sku>" ga-measurement-id="<your-ga-4-measurement-id>"></epigraph-tour>5. Hiding the default UI
Most of the UI within our solutions is designed keeping versatility of our customer websites in mind, there might be a need to customize the UI at times. We offer 2 different approach to do so:
- Customize the existing designs using CSS, highlighted within multiple sections here: https://docs.myepigraph.com/docs/epigraph-button-knowledgebase
- Hide the default UI and build your own using the APIs exposed
<epigraph-tour sku="<insert-the-product-sku>" hide-ui></epigraph-tour>
6. Accessing the API
API methods: https://docs.myepigraph.com/docs/epigraph-tour-api
To access the public functionality exposed with these solutions, you first need access to the element itself and each solution should have an api exposed on it via solutionRef.api, shown below:
// in your javascript file or script tag. Make sure to replace the ID below
const epigraphTourElement = document.querySelector("#<replace-with-the-id-you-gave-to-the-component>")

// Example of calling a valid public function
epigraphTourElement.api.launchAR();
Updated 2 months ago